We had some tuna steak in the refrigerator that I wanted to cook already, and a recipe for honey grilled salmon by Sarina Fores in the Assumption Cookbook. I tweaked the recipe a little bit (we didn't have pineapple juice so I brought out a small can of tuna chunks instead), and this is what I came up with.
Ingredients:
1 slab tuna fillet (good for two)
vegetable oil
salt and pepper
Honey Pepper Sauce:
3/4 cup honey
1/3 cup soy sauce
1/4 cup dark brown sugar
a small can pineapple chunks
juice of 1 lemon
2 tbsp vinegar
2 tsp olive oil
2 tsp ground black pepper
1/2 tsp paprika (we actually didn't have any paprika on hand so I used a steak rub that had pepper and paprika in it)
1/4 tsp garlic powder
1. Rub the tuna fillet with vegetable oil and season with salt and pepper. Grill around 2 - 3 minutes on each side.
2. In a saucepan combine al ingredients for honey pepper sauce and cook over low-medium heat. Stir occasionally until sauce begins to boil. Turn down heat and simmer for 13 minutes or until slightly thick.
3. Pour some of the honey pepper sauce and the pineapple chunks over grilled tuna and serve with extra sauce on the side.
The sauce was yummy, although it would've been okay with less sugar (it was quite sweet!). We also had a lot of sauce left over, so the sauce is probably good enough for 3 or 4 people.
Find other people blogging about: tuna+recipes
Sunday, November 25, 2007
Wednesday, November 14, 2007
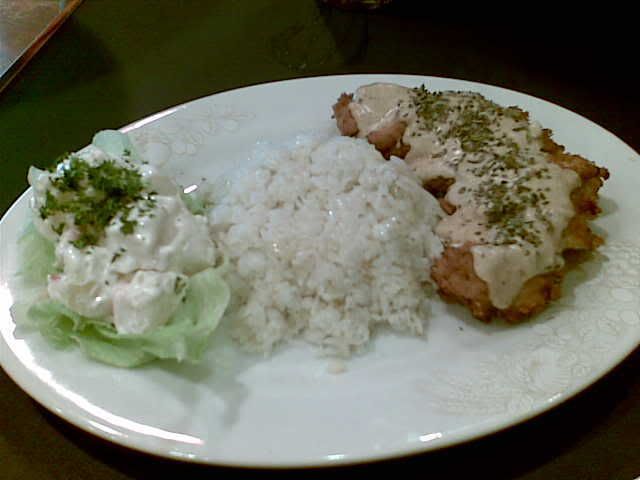
Chinese Panfried Chicken Fillets
Sorry for the uncreative title. This dish started out as a craving for Hainanese chicken. True Hainanese chicken, however, takes a couple of hours to prepare and cook, and we were already hungry, so that was out of the question. Meanwhile, Mike wanted to do something with the 9-Minute Marinator. And this is what we ended up making.
Ingredients:
2 pieces filleted chicken breast (total of 350 g)
pinch of salt
1 tbsp light soy sauce
1 tsp rice wine
.5 inch piece ginger, bruised
1 garlic clove, finely chopped
1/4 onion (we should've used spring onion, but we didn't have any)
sesame oil
We put the first seven ingredients plus 1 tsp sesame oil in the marinator and allowed it to marinate. After that, we pan-fried the chicken in a generous amount of sesame oil on a low-medium flame, five minutes uncovered on each side. Then we turned the fire to low and covered the pan, frying it for an additional 6 minutes, turning once.
After that we set the chicken aside, and we poured about 3 tbsp of water into the pan and scraped up all the chicken fat into it to make a sauce. We poured the sauce over the chicken fillets.
We served it with a dipping sauce of minced ginger, chili garlic paste, a drop of sesame oil and light soy sauce.
The dish was quite yummy and was gone in about 5 minutes. :) The thinner parts of the fillet were slightly dry, though, so the next time we'll take the chicken out of the pan a little earlier. Mike also suggested we try adding a teaspoon of Chinese black vinegar to the marinade.
Find other people blogging about: Chinese+food
Tuesday, November 13, 2007
The 9-minute Marinator
I have a confession to make. I really get a kick out of watching Infomercials, especially the ones about products that have to do with the home (kitchen gadgets, cleaning gadgets, and furniture-related items).
Mike doesn't share my enthusiasm for Infomercials (I suppose few people do) ... except for ... the Infomercial on the 9-minute Marinator!
So last weekend, I decided to bite the bullet and shell out the money for an early boyfriend-girlfriend anniversary gift for my husband. And I ordered it. It was the first time I'd ever ordered something from an Infomercial.
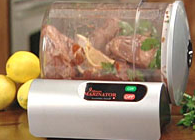
(While looking for the above picture, I got jealous when I found out that the Canadian company that sells it offers a chopper and two vacuum-seal food canisters along with the marinator! The only thing that comes after "And wait, there's more!" on the Philippine version of the Infomercial is a pair of bendable chopping boards. Grrr.)
It arrived at home yesterday.
So last night we made tuna steaks. We threw in some lemon juice, butter, salt, and pepper along with the tuna, in the Marinator for 5 minutes, and grilled the tuna on our electric grille.
Tonight we'll try real steaks.
Yummm ..... I can't wait to get home.
Find other people blogging about: cooking+gadgets
Mike doesn't share my enthusiasm for Infomercials (I suppose few people do) ... except for ... the Infomercial on the 9-minute Marinator!
So last weekend, I decided to bite the bullet and shell out the money for an early boyfriend-girlfriend anniversary gift for my husband. And I ordered it. It was the first time I'd ever ordered something from an Infomercial.
(While looking for the above picture, I got jealous when I found out that the Canadian company that sells it offers a chopper and two vacuum-seal food canisters along with the marinator! The only thing that comes after "And wait, there's more!" on the Philippine version of the Infomercial is a pair of bendable chopping boards. Grrr.)
It arrived at home yesterday.
So last night we made tuna steaks. We threw in some lemon juice, butter, salt, and pepper along with the tuna, in the Marinator for 5 minutes, and grilled the tuna on our electric grille.
Tonight we'll try real steaks.
Yummm ..... I can't wait to get home.
Find other people blogging about: cooking+gadgets
Sunday, November 04, 2007
Restaurant reviews: In-yo and Galileo
It was my birthday last week, so in a span of a few days, we got to celebrate at two supremely delicious restaurants.
Restaurant number 1 was In-yo, a house converted into a restaurant along Esteban Abada, parallel to the part of Katipunan Avenue fronting Ateneo. I'd passed by there several times before and had heard good reviews about it, but given that it's priced out of our normal everyday-fare range, I'd never stopped to eat there. Until last week.


The place is very nicely decorated, classy and cosy, but it's the food--fusion--that you'll be writing home about. My husband was skeptical at first: "At these prices, the food had better be good," but he was definitely not disappointed, and the food in fact exceeded his expectations.
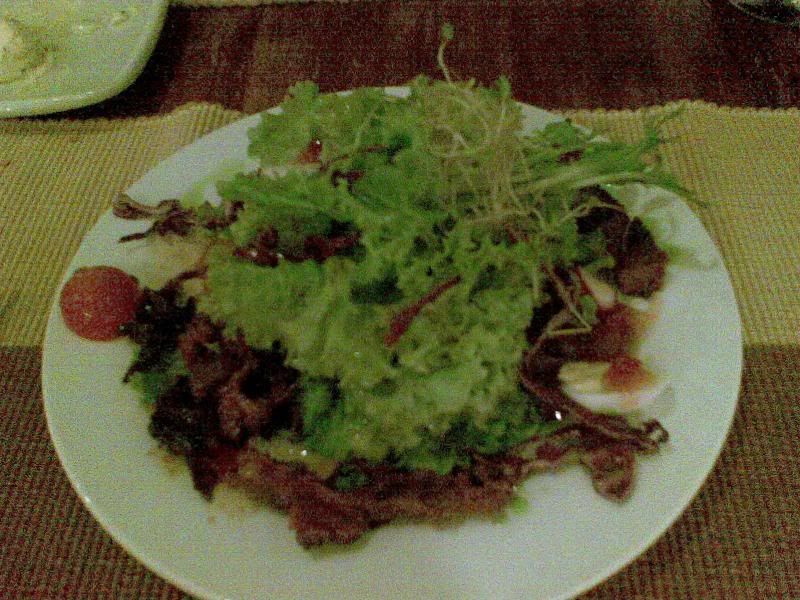
The prices are close to hotel prices: P1000 for the degustacion (a set meal where you get to taste several different courses), and around P400 for an entree, but to be quite frank, the food was better than I'd eaten at many hotels. The pumpkin soup was the best I'd ever eaten, the halibut pasta was divine, and the lamb shanks made our eyes grow big with delight at the first bite.
Needless to say, we were raving about In-yo for days after, and we'll definitely be back.
=====
Restaurant number 2 was Galileo, a little Italian deli and restaurant along Calbayog Street in Mandaluyong. The restaurant is decorated to make guests feel like they're walking into the wine cellar of a monastery, with ceiling-to-floor bottles of Italian wine, and simple wooden benches to sit on.


For what you get, the food is quite reasonable. The set meal is P450 (VAT included), for which you get a glass of house wine, antipasto (a platter of cheese and cold cuts), pasta (your choice among the day's specials), and a cup of coffee or tea. We each got a set meal and also shared a salad and an order of bruschetta and with all that, plus the bread basket we'd started with, we were absolutely stuffed. The a la carte entrees are less than P300.

The food is scrumptious!
In-yo Fusion Cuisine: Estaban Abada St., Loyola Heights, QC, 9286459, closed on Mondays. Galileo Enoteca: 80 Calbayog corner Malinao St., Mandaluyong, 5344633 or 5320482.
Find other people blogging about: Philippine+restaurants
Restaurant number 1 was In-yo, a house converted into a restaurant along Esteban Abada, parallel to the part of Katipunan Avenue fronting Ateneo. I'd passed by there several times before and had heard good reviews about it, but given that it's priced out of our normal everyday-fare range, I'd never stopped to eat there. Until last week.
The place is very nicely decorated, classy and cosy, but it's the food--fusion--that you'll be writing home about. My husband was skeptical at first: "At these prices, the food had better be good," but he was definitely not disappointed, and the food in fact exceeded his expectations.
The prices are close to hotel prices: P1000 for the degustacion (a set meal where you get to taste several different courses), and around P400 for an entree, but to be quite frank, the food was better than I'd eaten at many hotels. The pumpkin soup was the best I'd ever eaten, the halibut pasta was divine, and the lamb shanks made our eyes grow big with delight at the first bite.
Needless to say, we were raving about In-yo for days after, and we'll definitely be back.
=====
Restaurant number 2 was Galileo, a little Italian deli and restaurant along Calbayog Street in Mandaluyong. The restaurant is decorated to make guests feel like they're walking into the wine cellar of a monastery, with ceiling-to-floor bottles of Italian wine, and simple wooden benches to sit on.
For what you get, the food is quite reasonable. The set meal is P450 (VAT included), for which you get a glass of house wine, antipasto (a platter of cheese and cold cuts), pasta (your choice among the day's specials), and a cup of coffee or tea. We each got a set meal and also shared a salad and an order of bruschetta and with all that, plus the bread basket we'd started with, we were absolutely stuffed. The a la carte entrees are less than P300.
The food is scrumptious!
In-yo Fusion Cuisine: Estaban Abada St., Loyola Heights, QC, 9286459, closed on Mondays. Galileo Enoteca: 80 Calbayog corner Malinao St., Mandaluyong, 5344633 or 5320482.
Find other people blogging about: Philippine+restaurants
Saturday, August 18, 2007
Baked orange chicken
I got a recipe from Epucurious.com and adapted it a little. Here it is:
1 pack chicken drumsticks (8 pieces)
salt and pepper
1 tsp dried thyme
Citrus Mix:
2 tbsp calamansi juice from concentrate (mixed)
1/4 cup fresh orange juice
1-1/2 tbsp honey
1 tbsp ginger root, crushed
2 tbsp melted butter/margarine or olive oil
1. Preheat oven to 350 degrees.
2. Combine the ingredients for the citrus mix and mix well. Baste chicken pieces generously with the citrus mix. Sprinkle chicken pieces with salt, pepper, and thyme.
3. Bake chicken uncovered in a baking dish for 30 minutes.
4. Remove from oven. Turn over chicken pieces and baste generously again, with the rest of the mix.
5. Return chicken to oven and bake for another 15 to 20 minutes, or until done.
Serves 3.
(For a slightly healthier dish, remove the chicken pieces from the sauce when cooked, and just pour a little of the sauce over the chicken to serve.)
The dish was okay, except it was a little difficult to get the chicken cooked just right (I had to put it back in twice). Also, Mike said it was a little too gingery.
Find other people blogging about: chicken+dish
Monday, August 13, 2007
Breakfast.
Via was asking what Mike and I eat for breakfast .... I find it funny that I've written so little about breakfast, considering that Mike and I take our breakfasts quite seriously! When we go grocery-shopping, choosing our breakfast food is often a high point of the trip.
I like heavy breakfasts, since I need to have a lot of energy when I'm in the classroom, so a traditional Filipino breakfast--i.e., a rice breakfast--makes me very happy. The rice is usually either sinangag (last night's leftover rice, fried with lots of garlic) or freshly steamed. I grew up in a Batanguenyo household, where we poured tsokolate on our steamed rice in the morning (I learned from my friend Jan that Ilonggos do this too), so sometimes I do that as well. (Mike thinks it's strange, but then, he's not Batanguenyo.) Alternately, I sprinkle furikake (rice seasoning--one of the best Japanese inventions!) on my rice for some extra flavor. (You can sometimes find furikake in the Japanese aisle of big supermarkets.)
Our ulam for rice breakfast meals is usually something easy to cook, with zero preparation. Sometimes we have pre-marinated beef tapa (our favorite is the one from Lapid's--yes, they do tapa too!), sausages or cold cuts (we are fans of the very affordable but very yummy products from Earl's delicatessen), tuyo or daing out of a jar (we like Connie's Kitchen), chicken nuggets, beef franks, or something out of a can like corned beef or Spam Lite. Another favorite breakfast ulam of ours is Sarangani's tinapang bangus. It just needs to defrost a little after you pull it out of the freezer, then you just heat in the microwave for 2 to 3 minutes.
And of course, it isn't a true Filipino breakfast without egg. I love scrambled eggs the way my mom taught me to make them: I beat them very well with a generous amount of milk, and I continue to beat them (or more like mix them) in the pan so they get as fluffy as possible.
Sometimes, instead of rice, we have bagels with ham and cream cheese. Yummy and quite heavy.
When we're in a rush and we don't have time for a heavy breakfast, we each have a bowl of cereal and milk. Shopwise has wonderful cheap cereals (P80 to P120 a box). Sometimes we each chop a banana into our cereal bowls so it isn't too light.
On weekend mornings when we have more time to cook, we make ourselves a generous, sinful omelette oozing with cheese and either bacon or ham. Other times, we'll have pancakes or French toast.
And finally, on really lazy weekend mornings, when we wake up late, I'll sometimes just make a banana smoothie for each of us, then we save our appetite for brunch. :)
I promise to give more details about our breakfast meals in future posts. :)
Thanks for the idea, Via!
Find other people blogging about: breakfast
Sunday, August 12, 2007
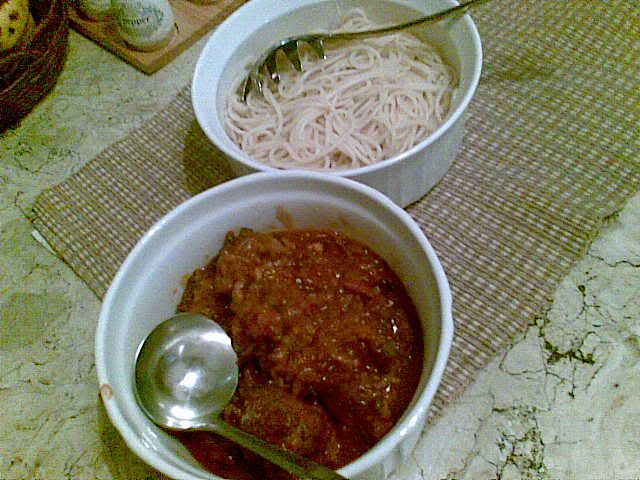
Beef Stroganoff, 2
We made another beef stroganoff for lunch today, tihs time following a recipe from an excellent cookbook: Mike's parents' compilation of recipes. We made a few adjustments, and here it is:
250g beef stroganoff, seasoned with salt (or meat tenderizer) and pepper
1 tbsp butter
1/2 onion, chopped finally
1/2 cup beef broth thicketned with 1-1/2 tbsp flour
1 tbsp dijon mustard
2 tbsp red wine
1 tsp Worcestorshire sauce
1/2 can mushrooms, chopped
1/2 cup sour cream, yogurt, or cream
salt and pepper to taste
Sautree onions in butter. Add beef and sautee until brown. Add beef broth, mustard, wine, and Worcestorshire sauce. Simmer for 10-15 minutes (longer to tenderize beef). Five minutes before serving add mushrooms, sour cream, and salt & pepper to taste. Serve on spaghetti pasta or rice.
Serves 2.
Yum! This version was a lot thicker than my last attempt, because of the flour; I realize that when serving the stogranoff with pasta (which is what we did), it's important to have thick sauce, so that the sauce coats the pasta properly. With rice, the flour isn't necessary, methinks.
Find other people blogging about: beef+stroganoff
Sunday, August 05, 2007
Moussaka, with eggplant
Ingredients:
250 g lean ground beef
garlic salt
pepper
1/4 cup tomato sauce
1/8 cup red wine
2 tbsp English brown sauce (ketchup will also do)
2 tomatoes, diced
olive oil
1/4 tsp nutmeg
1/8 tsp cinnamon
1/4 tsp allspice
dash of Tabasco
1 onion, finely chopped
1/2 an eggplant (we don't like eggplants much, so we kept it to a minimum), sliced
Cheese Mix/Bechamel Sauce:
For an easy cheese mix: 1 egg, beaten and 1-1/2 cups quickmelt cheese, grated
For bechamel sauce, also add:
1/2 cup milk
1/2 tbsp flour
1 additional egg, beaten
1. Chop eggplant into small pieces and put in a cup with salt water. Allow to sit.
2. Mix the tomato sauce, brown sauce, red wine, garlic salt (to taste) and pepper (to taste) into the beef.
3. Caramelize the onions in olive oil. Add the beef until brown. Simmer until dry.
4. While beef is simmering, preheat the oven to 350 degrees Celsius.
5. Rinse the eggplant pieces, then fry the eggplant in olive oil in a separate pan.
6. Prepare the easy cheese mix by beating the egg and mix in the grated cheese. To make the bechamel sauce instead, heat the milk and add the flour little by little, stirring constantly. Mix in the cheese and eggs, stirring until sauce has thickened. Remove from fire and allow to rest.
7. When beef is done, season with nutmeg, cinnamon, allspice, and Tabasco. Mix in the tomatoes.
8. Place a layer of the eggplant on the bottom of a baking pan. Pour beef as the second layer. Top with the cheese mix/bechamel sauce.
9. Bake for 20 minutes.
Find other people blogging about: Greek+food
Composting.
The village where we live has implemented a composting policy. The garbage men who come to our village will no longer collect our biodegradable garbage: residents are encouraged, instead, to compost all of our biodegradable trash.
For P600 each of us can buy a composting bin and 25-kilo sack of special composting soil. The composting bin is a plastic drum with the bottom cut out and holes drilled into the body, meant to be placed in the garden. However, any container can actually take its place; some people just use a circle of wiremesh (the wire improves air circulation) in their garden. The soil has some fertilizer and microorganisms in it already, to make the decomposition process happen more quickly, but again, regular soil can also be used. Some people don't use soil at all, but without soil, it might be slightly more difficult to find the right mix of organic trash to activate the decomposition process; moreover, one has to be a little more judicious about what kind of organic waste to compost (see below).
What can be composted? Technically, anything that's organic, although websites I consulted recommend that manure and urine from carnivorous animals (such as dogs and cats), diseased plants, and ash from charcoal not be home-composted, because the heat of home composting piles rarely reaches the intensity necessary to kill pathogens that can spread disease and illness to other plants or, if the waste seeps into water sources, to humans. When soil isn't used, it's also a good idea to avoid using meat, milk, dairy and fish products, as rodents and other animals may come and try to dig these out of the composting heap. Those planning to use the compost to fertilize vegetable patches might also want to avoid adding weeds to their compost pile, so the weeds don't spread to their vegetable patches. Wood scraps (from untreated wood), ash from untreated wood, food scraps, fruits and vegetables, garden trimmings, shredded black and white newspaper, shredded clean (unwaxed) paper, shredded toilet paper, manure from vegetarian animals, shredded cardboard rolls, shredded cardboard cereal boxes (if unwaxed), coffee grounds and filters, cotton or wool (i.e., natural) rags, lint from driers and vacuum cleaners, crushed eggshells, hair and fur, nut shells, tea bags, sawdust, and dead leaves all can be composted without problems.
The composting process is simple. First, organic trash needs to be cut into small pieces to hasten decomposition. It is best if the bottom of the composting heap is well-aerated, either by using a composting bin with holes in the bottom, or by putting an initial layer of wood materials and scraps that can allow air to pass through. After this, the bottom layer of the heap should be a two-inch layer of soil or nitrogen-rich garbage ("green stuff" such as fresh grass clippings, kitchen vegetable scraps, manure from vegetarian animals, or [brace yourself for this] a bit of human urine). The next layer (no thicker than two inches) can be any kind of organic garbage (this is the layer where carbon-rich waste is concentrated: "brown garbage" such as dead leaves, newspaper, and wood scraps), followed again by a two-inch layer of soil or nitrogen-rich garbage. As trash accumulates, this process of layering continues. It is helpful to keep the heap covered so it doesn't get too wet with rain, and so rodents or animals will not try to dig through the composting heap.
If your compost bin is made up of a lot of food, watering the compost heap isn't necessary, because kitchen scraps contain a lot of water. (I think the humidity of the Philippines also helps to keep the composting heap moist.) Compost bins composed of very dry materials, however, need to be watered a little until damp (not too much!) as each layer is added.
In ideal conditions, composting takes just three to six weeks. The compost heap will first warm up then will begin to cool. In ideal conditions, it should emit a sweet, earthy aroma. When conditions are less than ideal (e.g., heap is too dry, too wet, or has too little nitrogen-rich materials), decomposition may take a bit longer. You can correct this easily, depending on the problem. If the pile is not warming up, add more nitrogen-rich materials, sprinkle with water, and turn the pile a little with a rake or shovel. If the pile has a foul garbage-like odor, add more nitrogen-rich materials. If the pile is too wet and soggy, add more dry materials (such as dried leaves), and turn the pile.
After the compost heap is warmed up and then cooled, the compost heap is almost ready! Turn over the pile, to allow the bottom to dry. When done, the compost can be used as a thin layer of fertilizer for the garden and for house plants.
=======
Our homeowners' association in our village resells composting soil, but if you're interested you can contact Lacto Asia Pacific Corporation, the suppliers of Happy Soil at 7761511 or email address lactoasia[at]yahoo[dot]com.
Find other people blogging about: composting
Sunday, July 22, 2007
Deep-fried tofu with teriyaki sauce
1 block firm tofu, chopped into 4 cubes
Japanese breadcrumbs
1 large egg, beaten
salt
chili powder
teriyaki sauce
vegetable oil
Mix 1/2 tsp chili powder and a pinch of salt with the breadcrumbs. Dip each cube of tofu into the egg, and then coat well with breadcrumbs. Heat the oil, and when sufficiently hot, deep fry the tofu cubes in the oil until well-browned. Allow to dry on a paper towel before moving to a service dish.
In a separate pan, heat some teriyaki sauce. Pour the teriyaki sauce over the tofu cubes. Serve.
Find other people blogging about: tofu
Moussaka, without the eggplant
We tried to put together a moussaka yesterday, but we didn't have eggplant, so it became a moussaka without eggplant.
Here's what we did.
250 g lean ground beef
1 egg
1 cup quickmelt cheese, grated
salt and pepper
2 potatoes, sliced 1/4 inch
1/4 cup tomato sauce
1/4 cup red wine
1 tomato, diced
olive oil
1/2 tsp oregano
1/4 tsp nutmeg
1/4 tsp cinnamon
1 onion, finely chopped
1. Fry the potatoes slices in vegetable oil. When done, allow oil to drain on a paper towel.
2. In a separate pan, cook the beef and onions in olive oil, until beef is brown. Season with oregano, nutmeg, cinnamon, salt and pepper.
3. When beef is brown, add tomato sauce and red wine. Simmer until dry, mixing in the tomatoes towards the end. Meanwhile, preheat the oven to 350 degrees.
4. Beat the egg and mix in the grated cheese.
5. Place a layer of potato slices on the bottom of a baking pan. Pour beef as the second layer. Top with the cheese mix.
6. Bake for 20 minutes.
The dish was yummy, but next time we'll add more cheese (around half a cup more) and do something more with the sauce. We'll also probably add some Tabasco to spice it up a little. And next time, we'll do it with the eggplant. :)
Find other people blogging about: Greek+food
Saturday, May 19, 2007
Spaghetti and meatballs
Mike made a yummy spaghetti and meatballs dish for dinner.
Meatballs:
250 g lean ground beef
whites of 2 eggs, slightly beaten
3/4 cup breadcrumbs
1/4 tsp dried oregano
1/4 tsp dried basil
1/2 tsp ground allspice
pepper, to taste
garlic salt, to taste
1 native onion, finely chopped
3 cloves native garlic, ground
cooking oil
Sauce:
1 pack ready-made tomato spaghetti sauce (we used Del Monte)
1 slice of cooked double-back bacon, finely chopped (we used Earl's)
2 native onions, finely chopped
1/4 tsp dried basil
olive oil
In a mixing bowl, mix the breadcrumbs with the egg whites. Mix in the lean ground beef, allspice, pepper, garlic salt, and garlic. Mix well. Form meatballs. Sprinkle dried oregano and basil on the meatballs.
In a pan or wok, fry meatballs in oil until browned on all sides, about 5 to 6 minutes. Lay on a paper towel to drain oil.
Boil water for the pasta. While waiting for water to reach rolling boil, prepare the sauce separately. Heat olive oil in a separate saucepan. Add onions and allow them to caramelize. Add bacon until warm. Pour in spaghetti sauce. Allow to simmer for around 20 minutes, stirring from time to time to prevent bacon from scorching. Add dried basil. If sauce gets too thick, add a little water (not more than 1/4 cup at a time) and mix well. Add meatballs and allow to simmer for another 5 to 10 minutes to make sure that meatballs are cooked through.
Prepare pasta according to directions. Drain.
Serve spaghetti topped with sauce and meatballs. Sprinkle with grated parmesan cheese.
A yummy classic!
Find other people blogging about: spaghetti+meatballs
A trip to Assad Mini Mart
I looooove Asian cuisine--Filipino, Singaporean, the different regional cuisines of China, Malaysian, Thai, Vietnamese, Indian, Japanese, Korean ... you name it! (Well, with the exception of some North Indian and West Asian/Middle Eastern dishes: I'm not really into beans.)
And the secret to authentic Asian food, as most people know, is finding the right flavors and spices! Using, for example, Japanese soy sauce for a Chinese dish is simply wrong, and Malaysian food without lemongrass just isn't the same ....
Of course, it isn't always easy to find spices which aren't endemic to the Philippines. A few substitutions can be made, because a lot of ingredients in other Asian countries have parallels in the Philippines. (You can, for example, use Filipino patis instead of Thai patis, although it's harder to use Filipino shrimp bagoong in place of Malaysian belacan, because the taste just isn't the same.)
But oh, the difference it makes when you find authentic ingredients!
A few months ago, a friend told me about the Indian groceries along U.N. Avenue, although I never got the chance to go. Today, however, I had an errand to run in Manila. And while we were there, Mike had the brilliant idea of eating at a little Indian eatery he had seen across Unilever. It was--you guessed it--right beside the row of Indian groceries!

So after eating scrumptious mutton curry and shrimp masala at Assad Cafe, Mike and I trooped to Assad Mini Mart, just a few doors away. I wanted to buy some ghee, but it came in a giant box and had an August 2007 expiry date (I told Mike: "I don't think we'll be having that much Indian food between now and August). It was also a little expensive. So instead we settled for dry spices and different kinds of masala powder. I was also tempted to get some lentils and basmati rice, but we didn't bring a lot of money for this excursion, so I changed my mind at the last minute.

I remember how we learned in history class that one of the principle motivators for the Europeans to explore the world was the spice trade. People actually died for these spices! And now all a Pinoy needs to do to get a bag of spices is to take a trip to U.N. Avenue. Hmmm.
Find other people blogging about: Indian+spices
And the secret to authentic Asian food, as most people know, is finding the right flavors and spices! Using, for example, Japanese soy sauce for a Chinese dish is simply wrong, and Malaysian food without lemongrass just isn't the same ....
Of course, it isn't always easy to find spices which aren't endemic to the Philippines. A few substitutions can be made, because a lot of ingredients in other Asian countries have parallels in the Philippines. (You can, for example, use Filipino patis instead of Thai patis, although it's harder to use Filipino shrimp bagoong in place of Malaysian belacan, because the taste just isn't the same.)
But oh, the difference it makes when you find authentic ingredients!
A few months ago, a friend told me about the Indian groceries along U.N. Avenue, although I never got the chance to go. Today, however, I had an errand to run in Manila. And while we were there, Mike had the brilliant idea of eating at a little Indian eatery he had seen across Unilever. It was--you guessed it--right beside the row of Indian groceries!
So after eating scrumptious mutton curry and shrimp masala at Assad Cafe, Mike and I trooped to Assad Mini Mart, just a few doors away. I wanted to buy some ghee, but it came in a giant box and had an August 2007 expiry date (I told Mike: "I don't think we'll be having that much Indian food between now and August). It was also a little expensive. So instead we settled for dry spices and different kinds of masala powder. I was also tempted to get some lentils and basmati rice, but we didn't bring a lot of money for this excursion, so I changed my mind at the last minute.
I remember how we learned in history class that one of the principle motivators for the Europeans to explore the world was the spice trade. People actually died for these spices! And now all a Pinoy needs to do to get a bag of spices is to take a trip to U.N. Avenue. Hmmm.
Find other people blogging about: Indian+spices
Friday, May 11, 2007
Stuffed Pork Tenderloin
I had a piece of pork tenderloin in the freezer and decided to try my hand at a stuffed loin. Here's the recipe:
1 250g piece pork tenderloin
2 tsp grain mustard
a few leaves of salad lettuce, cut into shreds
some bacon, cooked and chopped into bits
1/2 onion, finely chopped
1/2 tsp garlic powder
1 tsp dried sage
1 tsp dried oregano
Tabasco
whites of 2 eggs
3 tbsp bread crumbs
2 tsp Mesquite powder
vegetable oil
1. In a pan, saute onions until caramelized.
2. Remove some of the excess fat (although leave a film so that the pork does not lose too much moisture when cooking). Butterfly the pork loin and open flat. Pound on meat to make it thinner. Place on top of a sheet of alumnium foil.
3. Spread mustard on the top surface of the pork loin. Mix the bread crumbs into the egg whites and spread half of it on top of the mustard. Sprinkle garlic powder, sage, oregano, a few drops of Tabasco, and the shredded lettuce. Spread onions and bacon bits on the loin, then top with the rest of the egg whites and bread crumbs.
4. With a knife score the entire pork loin down the middle, lengthwise. Fold one half of the loin over the other, so that the stuffing is inside.
5. Brush a little bit of oil over the surface of the pork loin. Rub the surface with Mesquite powder.
6. Wrap the entire pork loin in the aluminum foil and leave it in the refrigerator for at least 20 minutes. Meanwhile, preheat the oven to 375 degrees Farenheit.
7. Remove pork loin from the foil and place it in a baking dish. Roast, uncovered, in the oven for 50 to 60 minutes. Allow pork loin to rest for a few minutes before serving.
Serves 2.
Verdict: The pork loin came out quite tasty, although both Mike and I were looking for some sauce to dip it in. Next time, I'll probably prepare it with a light mustard sauce or barbeque sauce.
Find other people blogging about: pork+tenderloin+recipes
Wednesday, May 09, 2007
Bulk Cooking
Although I haven't done it in a systematic way, I've been interested in the concept of "bulk cooking" (also known as "freezer cooking").
Bulk cooking is the practice of cooking huge amounts of food that are suitable to freezing, as infrequently as once a month (hence, it's other name, "once a month cooking"). All that food is stocked in the freezer, and the family simply warms up food as they go along. The result is that the family (or whoever does the cooking in the family) is able to save time and energy by having to cook less frequently.
There are other variations of bulk cooking as well, such as preparing ingredients for freezing, but not doing the actual cooking until the meal itself. The most basic form of bulk cooking, and the kind I'm inclined to, is simply doubling or tripling dinner recipes that are suitable to freezing, so that there are at least enough leftovers for lunch and maybe one additional dinner. (More tips for a less radical form of bulk cooking.)
I'd like to do this simplified form of bulk cooking a little more systematically, so I did some research about the tools required. The most obvious, of course, is some extra freezer space, which our freezer has a lot of, since we have a separate freezer. Having an oven is also helpful, because then you can bake more than one meal at a time. A microwave makes defrosting and reheating a cinch (and minimizes the softening of reheated veggies, or the overthickening of reheated reheated sauces). Depending on the amounts you intend to cook, you might eventually feel the need for bigger mixing bowls. You'll need a storage system, such as Tupperware, freezer bags (though they are more environmentally-harmful), or aluminum pans. Finally, bulk cooking advocates recommend that you have a marking pen on hand so that you can label and write the date that you prepared each dish.
Another thing to learn is which recipes are suitable for freezing, and which aren't. This article lists food items that don't freeze well. There list includes:
I'd also add mashed potatoes to the list.
On the other hand, stews and casseroles generally keep for up to three months, and sauces, for even longer, so that's a good place to start. (Personally I find that most stews taste better when reheated.)
Find other people blogging about: bulk+cooking
Bulk cooking is the practice of cooking huge amounts of food that are suitable to freezing, as infrequently as once a month (hence, it's other name, "once a month cooking"). All that food is stocked in the freezer, and the family simply warms up food as they go along. The result is that the family (or whoever does the cooking in the family) is able to save time and energy by having to cook less frequently.
There are other variations of bulk cooking as well, such as preparing ingredients for freezing, but not doing the actual cooking until the meal itself. The most basic form of bulk cooking, and the kind I'm inclined to, is simply doubling or tripling dinner recipes that are suitable to freezing, so that there are at least enough leftovers for lunch and maybe one additional dinner. (More tips for a less radical form of bulk cooking.)
I'd like to do this simplified form of bulk cooking a little more systematically, so I did some research about the tools required. The most obvious, of course, is some extra freezer space, which our freezer has a lot of, since we have a separate freezer. Having an oven is also helpful, because then you can bake more than one meal at a time. A microwave makes defrosting and reheating a cinch (and minimizes the softening of reheated veggies, or the overthickening of reheated reheated sauces). Depending on the amounts you intend to cook, you might eventually feel the need for bigger mixing bowls. You'll need a storage system, such as Tupperware, freezer bags (though they are more environmentally-harmful), or aluminum pans. Finally, bulk cooking advocates recommend that you have a marking pen on hand so that you can label and write the date that you prepared each dish.
Another thing to learn is which recipes are suitable for freezing, and which aren't. This article lists food items that don't freeze well. There list includes:
- fried food
- cake icings made with egg whites
- custard and cream fillings
- soft cheese
- mayonnaise
- sour cream
- potatoes, when cooked in soups and stews
I'd also add mashed potatoes to the list.
On the other hand, stews and casseroles generally keep for up to three months, and sauces, for even longer, so that's a good place to start. (Personally I find that most stews taste better when reheated.)
Find other people blogging about: bulk+cooking
Tuesday, May 08, 2007
Twenty Steps to a Healthier Kitchen
Now that Mike and I are in our 30s (just barely), we're getting more health-conscious. In our 20s, being healthy for us meant doing (or trying to start doing!) some kind of physical activity to keep us fit. But now that we're in our 30s, being healthy isn't confined only to the activities that we do, but also, what we eat.
The great thing about cooking our own meals is that we have greater control over what goes into our body. I've become more conscious about this over the last few months and have kept health, instead of just price, as one of my main criteria when choosing food while supermarketing.
We're far from being poster-children for health, of course. But we're trying, little by little, to be healthier. Allow me to share with you a list of some of the steps we've been taking, or have been trying to take, in the Palacios kitchen:
Find other people blogging about: healthy+cooking
The great thing about cooking our own meals is that we have greater control over what goes into our body. I've become more conscious about this over the last few months and have kept health, instead of just price, as one of my main criteria when choosing food while supermarketing.
We're far from being poster-children for health, of course. But we're trying, little by little, to be healthier. Allow me to share with you a list of some of the steps we've been taking, or have been trying to take, in the Palacios kitchen:
- Never buy carbonated softdrinks (sodas) in the grocery unless you're hosting a party. Replace softdrinks with healthier alternatives like fruit juice (our favorite of late is calamansi concentrate), or the best alternative of all: water.
- Shell out the extra money to buy the leanest (or at least the leaner) meat at the butcher's. It may seem like it's hurting your pocket now, but remember that health is a more important form of wealth.
- Always have fresh fruits in the house, and keep them within easy reach. When your stomach is craving for a midday snack, reach for a banana instead of a bag of potato chips.
- Speaking of potato chips: when you're in the supermarket, skip the "junk food" aisle altogether. The only time you should buy potato chips is if you're going on an out-of-town trip.
- If your family has a history of hypertension (which is true for both Mike's and my families), then you should be watching your salt intake. Use herbs and spices instead of salt to flavor your food. Stock up on a variety of dried herbs and learn which goes with which food so you can easily add them to the dishes you're cooking.
- Speaking of salt: keep the salt shaker away from the dining table.
- Filipino weight-watchers: go easy on the rice. Control your rice portions by serving rice in individual rice bowls at the dining table.
- Milk isn't just for kids. Have a glass of milk (low-fat or skim, now that you're an adult) every evening, before going to bed. It's good for digestion, too.
- Carrots are wonderful! Super-rich in vitamins, barely any calories, and fantastic for main courses, soup, snacks, salad, or even dessert. Plus they keep very well so you can store them in your refrigerator longer than you can greens. Buy carrots every time you go to the supermarket and look for different ways to slip them into your meals.
- Buy salad greens every time you go to the supermarket, and always have some salad dressing (whether home-made or store-bought) handy at home, so that you'll be ready to eat a salad in no time. A note when buying lettuce: choose deep green (or red, as the case may be) lettuce like Romaine. Stay away from iceberg lettuce! Not only does iceberg have no nutritional value; it's actually bad for you! (Update: See comments section for more on this.)
- Olive oil and butter have about the same calorie count, but olive oil is healthier. It's also a lot more expensive, however. When making a recipe that calls for a lot of butter, consider replacing a third or even half of the butter with olive oil.
- And instead of using butter, use low-fat margarine instead.
- Buy whole wheat instead of white bread.
- Trim the excess fat of pork, beef, and lamb before cooking. And whenever you can, take the skin off the chicken. Chicken skin is almost pure fat.
- Speaking of chicken, don't pour the drippings back onto chicken when serving it ... (although I can't resist when it's a roast, because a roast chicken without drippings just isn't the same)!
- Consider using honey instead, when a recipe calls for sugar.
- Cut down on pan-fried and deep-fried food. Instead, bake, poach, steam ... and when you need to fry, stir-fry (i.e., chop your food into small pieces and fry it in a wok using a very small amount of oil).
- When you go to the butcher, have your meat bagged in exactly the amount you will need for cooking one dish. (For example, Mike and I always ask that our ground beef be bagged in bags of 200 to 250 grams each: one bag is thus exactly enough for one meal for the two of us.) That way, you never cook or eat more than you should.
- Limit the treats. Mike and I only allow ourselves to buy one kind of dessert when we go to the supermarket: dark chocolate.
- For the sake of your health and your wallet, always have a grocery list when you go to the supermarket, and follow it as much as possible. This way, you don't end up buying impulse purchases.
Find other people blogging about: healthy+cooking
Spices and Surprises
Mike and I came from England a few weeks ago, where Mike had to attend a business conference. Afterwards I headed to Hong Kong and Macau, while Mike headed home to the Philippines.
While we were away I stocked up on yummy spices that aren't easy to find in the Philippines. Here's our loot:

Everything you need for Hainanese chicken, in one box (except the chicken)! How convenient is that!
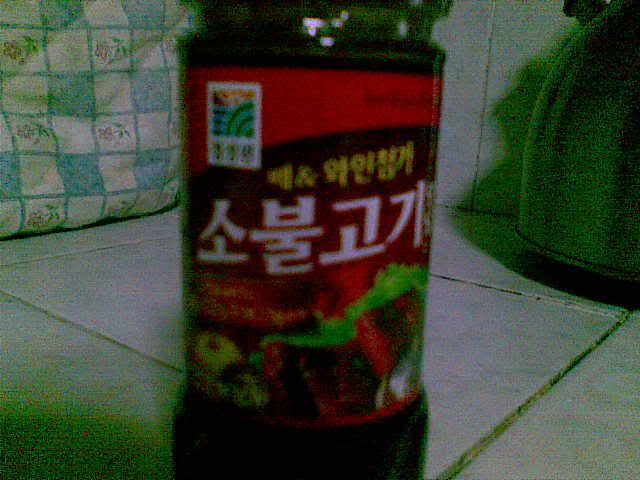
Beef bulgogi sauce.

Brown sauce. A must-have for a true full English breakfast.
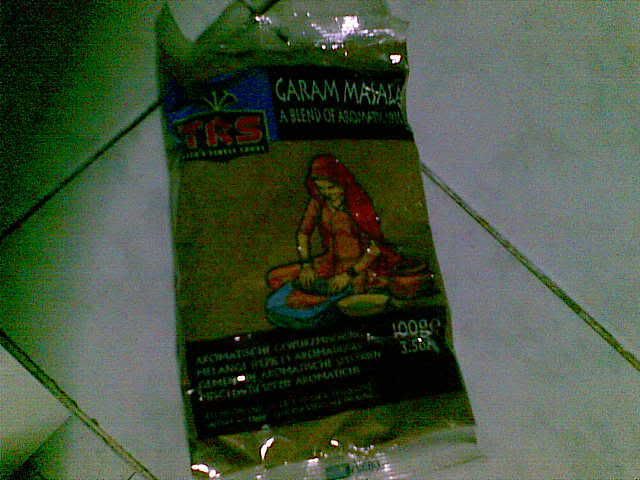
Garam masala.
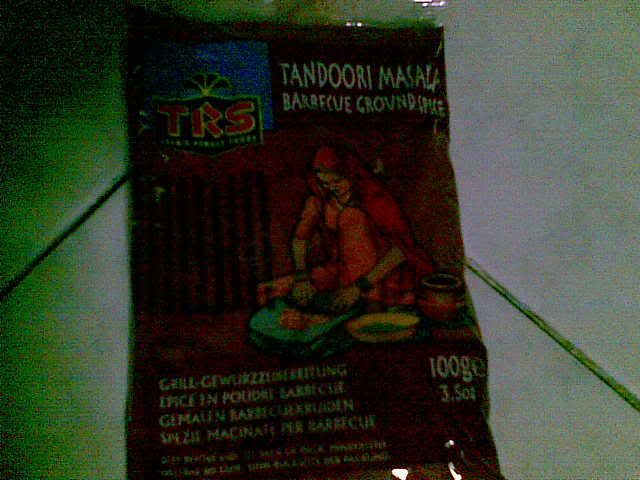
Tandoori powder.
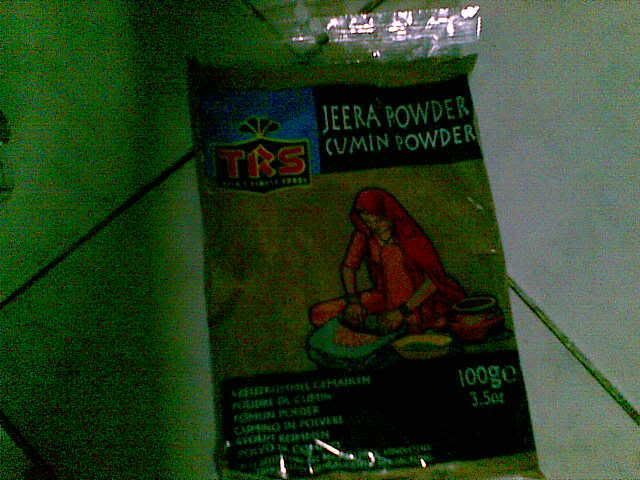
Cumin powder.
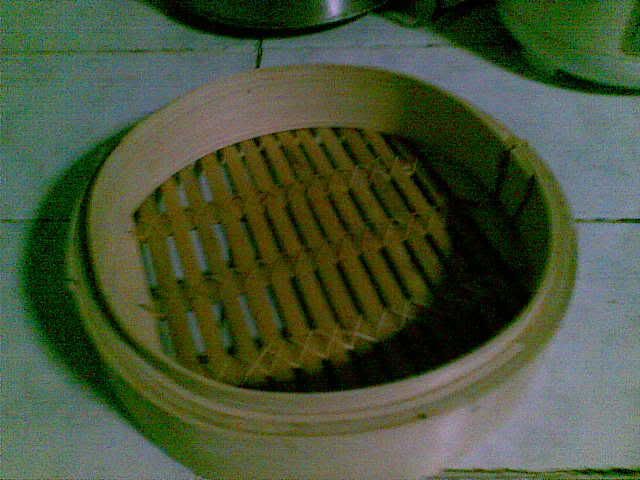
And I also got a bamboo steamer!
Find other people blogging about: kitchen+spices
While we were away I stocked up on yummy spices that aren't easy to find in the Philippines. Here's our loot:
Everything you need for Hainanese chicken, in one box (except the chicken)! How convenient is that!
Beef bulgogi sauce.
Brown sauce. A must-have for a true full English breakfast.
Garam masala.
Tandoori powder.
Cumin powder.
And I also got a bamboo steamer!
Find other people blogging about: kitchen+spices
Monday, May 07, 2007
Baked Honey-Mustard Chicken
We have a relatively new oven that we haven't used much, so today I wanted to experiment with it. I also had a jar of sunflower honey from Baguio, that I hadn't opened, so I decided to try an old classic: honey-mustard chicken. Below is the recipe I came up with. I actually wanted to use tarragon instead of basil but we're all out.
7 chicken thighs, washed and patted dry
2 tbsp butter or margarine
2 tbsp mustard
3 tbsp honey
1 tsp Worcestershire sauce
juice and rind from one small lemon
1/2 tsp garlic salt
1/4 tsp ground pepper
1/4 tsp dried basil
Preheat oven to 350 degrees Farenheit.
In a saucepan, combine over low heat the butter, mustard, honey, garlic salt, Worcestershire sauce and ground pepper until the butter melts. Mix well. Remove from heat then slowly mix in the lemon juice and rind.
Place the chicken thighs skin-side down in a greased oven-safe dish. Brush chicken with sauce. Bake covered for 30 minutes.
Remove chicken thighs from oven. Turn them over, skin-side up. Brush chicken with the remainder of the sauce. Sprinkle basil on the chicken. Return to oven and bake uncovered for another 30 minutes. For a healthier meal, pour out and throw away the drippings before serving.
Serves 3.
Preparation time: 20 minutes Cooking time: 1 hour
Calorie count: approx. 500 calories per serving
Verdict: It was yummy but we had to keep some extra sauce on the side to dip the chicken into as we went along. Next time I think I'll actually marinate the chicken instead of just brushing the sauce on it, for more flavor. Mike also suggested adding something to the sauce to give it an extra kick; I think I'll add some chili garlic next time for a little bit of spice.
Find other people blogging about: honey+mustard+chicken
Sunday, May 06, 2007
Lamb Stew
Mike's parents have a lamb recipe that is so good, Mike has dubbed it "Lamb of God." Unfortunately, I can't seem to find the sheet of paper where I copied that recipe, so instead I did some experimenting in the kitchen today, and tried to make a lamb stew from scratch.
Here's the recipe I used.
500 g lamb for stewing (shoulder, shank, neck or leg), chopped into cubes and excess fat trimmed
salt and pepper to taste
2 tbsp olive oil
1/2 garlic, finely chopped
2 medium native onions, finely chopped
1 tsp dried rosemary
1 tsp dried thyme
1-1/2 cup water
1 tsp sugar
4 native tomatoes, diced
1 large carrot, peeled and thickly sliced
1. Sprinkle the lamb with salt and pepper.
2. Heat olive oil in large pot over medium-high heat. Brown the lamb in batches, about 4 to 5 minutes per batch. Return all the lamb into the pot.
3. Add garlic and stir until fragrant.
4. Add onions, dried rosemary and dried thyme. Saute for a few minutes until onions have begun to caramelize (about 5 minutes).
5. Stir the sugar into the water until the sugar has dissolved. Add the water to the pot. Bring to a boil, then add the tomatoes and carrot. Wait until the stew boils again.
6. Reduce heat to medium-low, then cover with lid slightly ajar. Allow to simmer until lamb is tender (about 45 minutes to 1 hour). If stew dries out, add more water, 1/4 cup at a time. Season with salt to taste.
7. Serve stew with steamed rice.
Serves 4.
Calorie count: approx. 420 calories per serving.
Verdict: I'm proud of this dish. It's very flavorful. Mike liked it too.
As an afterthought, I threw in a chopped up chorizo sausage in the last few minutes of simmering, to make the dish taste a little more Spanish, although I added it too late to alter the flavor of the stew much. Maybe next time I'll try putting in the chorizo from the beginning, or replacing the carrot with chorizo and bacon to see how that'll taste. I'll try it next time and I'll let you know.
Just a quick note about the teaspoon of sugar. When Mike and I went to England on honeymoon we found out that English tomatoes are very sweet, unlike Filipino tomatoes which are rather sour! Since then, whenever I've encountered a Western recipe calling for tomatoes, I've continued to use native tomatoes but have added a little sugar, to bring the overall taste of the dish close to what was originally intended.
Find other people blogging about: lamb+recipes
Saturday, May 05, 2007
Beef a L'orange
Hey everyone! Sorry for the long absence. M and I were away for work, then I was away on holiday. But we're back and raring to get back into the kitchen.
It's difficult to find real orange juice in small quantities in the supermarket; the brand I buy only comes in 1-liter bottles. Once you open a bottle, it has to be consumed in a week, and I don't really drink the stuff for breakfast, so I thought it would be a good idea to look for additional orange juice recipes to make it easier to finish a bottle.
I found this recipe online and adapted it a little, and here's the version we finally tried.
2 beef steaks (suggested: tenderloin), cut 1 inch thick
1/4 tsp. garlic salt
1/4 tsp. ground ginger
1/4 tsp. ground pepper
2 tsp. dark sesame oil, divided
1/8 c. Soy sauce
1 tsp. cornstarch
1/4 c. fresh orange juice
1/8 c. balsamic vinegar
1/8 tsp. chili garlic sauce
Pound beef steaks, flattening to 3/4-inch thickness. Sprinkle both sides of steaks with garlic salt, ginger and pepper; brush with 1 teaspoon of the oil. Mix soy sauce and cornstarch in small saucepan until smooth. Add orange juice, vinegar, and hot pepper sauce. Bring to a boil over medium heat, stirring constantly. Reduce heat; simmer just until sauce becomes thickened, stirring constantly. Cover; remove from heat and set aside.
Heat remaining 1 teaspoon oil in large skillet over high heat. Add steaks; pan broil 3 minutes on each side (for medium rare). Add sauce to pan. Bring to a boil, turning steaks once or twice to glaze. Spoon half the sauce in equal amounts onto 4 individual plates. Place steaks on top of sauce; spoon remaining sauce in equal amounts over steaks.
Serves 2.
Total preparation and cooking time: 30 minutes.
Calorie count: approx. 264 calories per serving.
Verdict: It's all right but not fantastic. A "B" perhaps. The sauce is interesting; a little like teriyaki sauce, but less sweet, with a sour, tangy taste.
Find other people blogging about: beef recipes
Saturday, March 31, 2007
Restaurant review: Banapple
Mike and I discovered a new cafe/restaurant today. When I say "new" I mean this quite literally; today was its soft opening.

The place is called Banapple and it's along Katipunan Avenue, on the southbound side after the flyover, right across the street from Kopi Roti. (For those of you familiar with the area, it's where City Jam used to be.) The owners--a friendly 30-something couple--had run a home-based cake business for years, and when the orders became too much for their house to handle, they decided to rent space not just for a commissary but for their own restaurant!
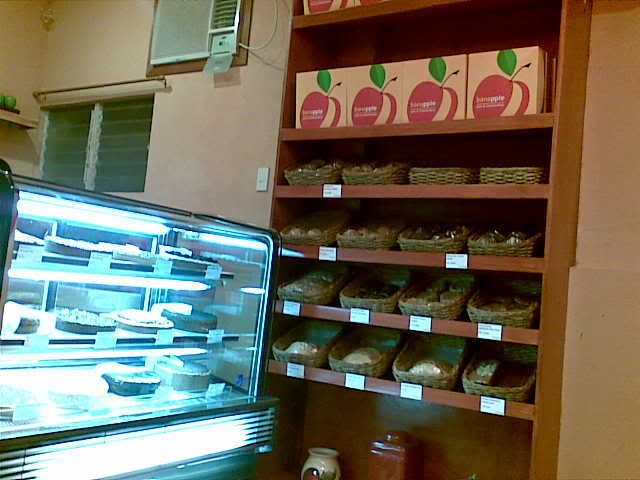
The interior is painted cheery shades of yellow and orange. On a refrigerated shelf, some ten to twelve cakes and pies--all looking quite scrumptious--are on display. Mike and I split an herbed chicken roll with basil cream sauce for dinner, and an apple caramel crumble for dessert.

The entree was very good and very filling for its price (P145). The apple pie slice (P75) was huge. The owner very kindly offered to warm it up for us, and we were very happy with the taste.
While its cakes and pies seem to be Banapple's centerpiece items, it also serves pancakes, sandwiches, pasta, and other rice entrees. I definitely recommend this place to anyone looking for a good meal in the P100-P200 price range.
Find other people blogging about: restaurant+reviews
The place is called Banapple and it's along Katipunan Avenue, on the southbound side after the flyover, right across the street from Kopi Roti. (For those of you familiar with the area, it's where City Jam used to be.) The owners--a friendly 30-something couple--had run a home-based cake business for years, and when the orders became too much for their house to handle, they decided to rent space not just for a commissary but for their own restaurant!
The interior is painted cheery shades of yellow and orange. On a refrigerated shelf, some ten to twelve cakes and pies--all looking quite scrumptious--are on display. Mike and I split an herbed chicken roll with basil cream sauce for dinner, and an apple caramel crumble for dessert.
The entree was very good and very filling for its price (P145). The apple pie slice (P75) was huge. The owner very kindly offered to warm it up for us, and we were very happy with the taste.
While its cakes and pies seem to be Banapple's centerpiece items, it also serves pancakes, sandwiches, pasta, and other rice entrees. I definitely recommend this place to anyone looking for a good meal in the P100-P200 price range.
Find other people blogging about: restaurant+reviews
Monday, March 12, 2007
Baguio vegetables
Mike and I spent the weekend in Baguio with our friends Anj and Jan and boy, what a food trip! Among the food highlights:
Happy happy joy joy.
Find other people blogging about: Baguio+vegetables
- An accidental trip to the Strawberry Farms. From Tam-awan village, we decided to look for the vegetable trading post in La Trinidad. We couldn't find it; instead we chanced upon a sign directing us to the La Trinidad strawberry farms! We happily walked among the strawberries in the field, taking pictures. We sampled strawberry taho, strawberry wine, and strawberry ice cream, and ended our visit by buying seven kilos of strawberries among the four of us, and a few jars of strawberry jam. Yum!
- Dessert at the Manor. We discovered that the Manor has excellent cakes and pastries! Sinfully delicious!
- Chocolate baterol at John Hay. Mmmm!
- Mongolian food at Oh May Kahn. Owned by the family of a batchmate of ours, Oh May Kahn has scrumptious Mongolian barbecue and a delicious a la carte menu as well.
- Soy coffee at Ben-hur Villanueva's gallery, Arko ni Apo. Sculptor Ben-hur Villanueva was Mike and Jan's art teacher in grade school! We introduced ourselves and ended up spending about an hour with Ben-hur and his gracious family. They served us interesting soy coffee made even more interesting with the wonderful company.
- Lunch at a Korean restaurant on Legarda road (I think). We enjoyed a scrumptious spicy chicken dish.
- Fresh vegetables from the Baguio market. Baguio vegetables!!! Oh, if only Metro Manila had vegetables as fresh and as cheap as Baguio does, we'd all be a much healthier city. I found watercress--a rarity in Manila (and made myself some Vietnamese Shaking Beef salad today). Fresh parsley was P20 per kilo and for five pesos I now have enough fresh parsley to serve it on every single dish for the next two weeks.
Happy happy joy joy.
Find other people blogging about: Baguio+vegetables
Saturday, March 03, 2007
Mesquite chicken
Mike made a yummy fried chicken dish the other day. He rarely doesn't measure ingredients when he cooks, but here, in general, is what went in the dish.
Ingredients:
5 chicken thighs, bones and skin removed
tomato catsup
mustard
vinegar
mesquite powder
Mix catsup, mustard, vinegar, and mesquite powder together. Marinade chicken in the mixture.
Fry covered until chicken is cooked through.
Extremely delicious dish.
Find other people blogging about: chicken+recipes
Sunday, February 18, 2007
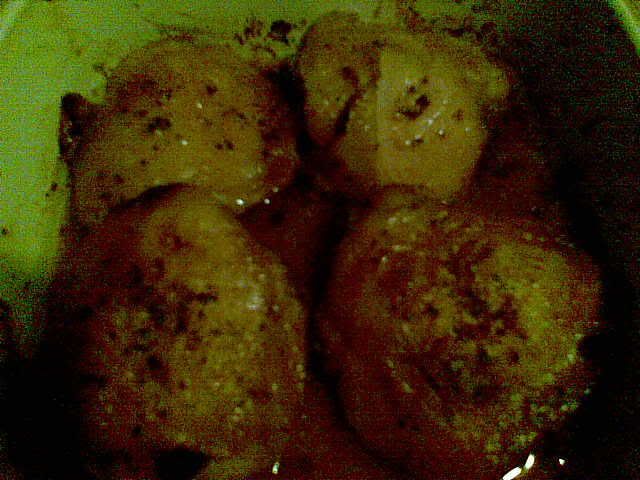
Lamb Masala
Mike and I did our grocery at the supermarket at Market Market for the first time this week, and we were thrilled to find an amazingly large Asian spices section, and a very good meat section as well.
One of our many finds was a meat masala mix from Pakistan.
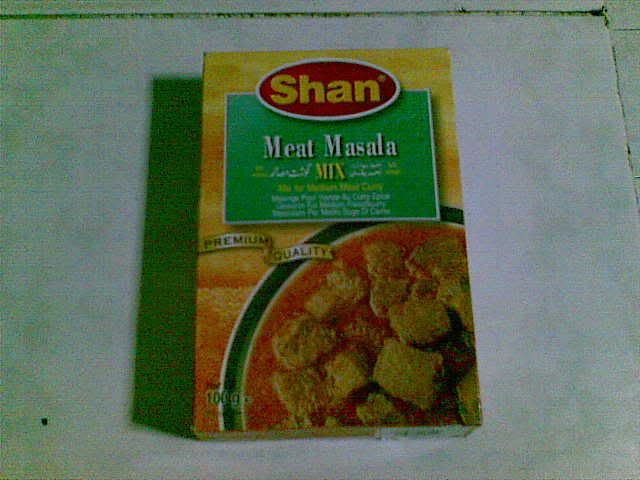
We bought some lamb from the butcher section and today we tried a lamb masala.
The recipe was on the back of the box was easy enough to follow. We made only a few changes. The first was using minced garlic and minced ginger instead of garlic/ginger paste (I don't have a blender yet, that's why). Secondly, the original recipe called for 1 cup oil or ghee (ghee is clarified butter, made by evaporating the water from butter). You'll see the change I made in the recipe. Third, we used less masala powder, just to be sure that it wouldn't be too spicy for our tastebuds.
Ingredients
500 g lamb (or other kinds of meat), cubed and excess fat trimmed
3 medium onions, finely sliced
1 meduim tomato, finely diced
1 tbsp garlic, minced
1 to 2 tbsp ginger, minced
1/2 cup unsalted butter
1/2 cup vegetable oil
1-1/4 tbsp masala powder
water
1. In a frying pan, heat butter on high-medium heat until it bubbles. Reduce heat to medium-low and cook uncovered until butter turns golden and foam has risen to the top.
2. Add vegetable oil. Then add lamb, garlic, ginger and masala mix. Stir-fry for a few minutes.
3. Add onions and stir-fry for 5 minutes. Then add tomatoes and 2 glasses of water.
4. Cover and cook on low heat until the lamb is tender (at least 45 minutes).
5. Uncover, increase heat and stir until oil/ghee has separated from the masala. Keep frying for a few minutes. Add 1/2 cup water for desired thickness of the gravy.
Serves 4 (based on recommended portion size).
Calorie count: 795 per serving (assuming you pour all the sauce over your rice).
The verdict: The resulting lamb masala was super- yummy!!! We will definitely buy this mix again.
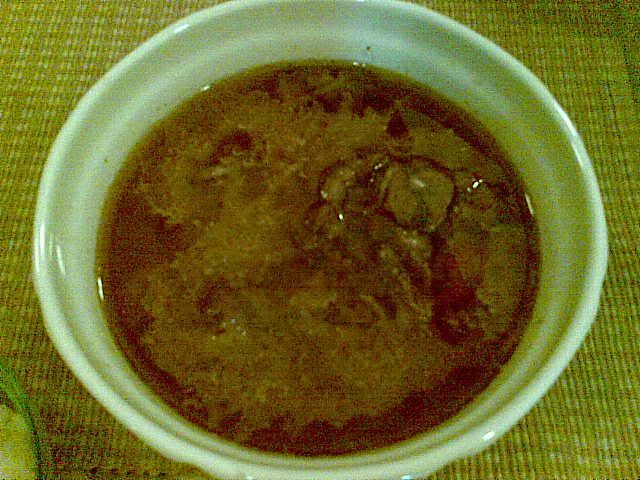
Some adjustments we will make in the future:
Ah, delicious. I love South Asian food!
Find other people blogging about: lamb+masala
One of our many finds was a meat masala mix from Pakistan.
We bought some lamb from the butcher section and today we tried a lamb masala.
The recipe was on the back of the box was easy enough to follow. We made only a few changes. The first was using minced garlic and minced ginger instead of garlic/ginger paste (I don't have a blender yet, that's why). Secondly, the original recipe called for 1 cup oil or ghee (ghee is clarified butter, made by evaporating the water from butter). You'll see the change I made in the recipe. Third, we used less masala powder, just to be sure that it wouldn't be too spicy for our tastebuds.
Ingredients
500 g lamb (or other kinds of meat), cubed and excess fat trimmed
3 medium onions, finely sliced
1 meduim tomato, finely diced
1 tbsp garlic, minced
1 to 2 tbsp ginger, minced
1/2 cup unsalted butter
1/2 cup vegetable oil
1-1/4 tbsp masala powder
water
1. In a frying pan, heat butter on high-medium heat until it bubbles. Reduce heat to medium-low and cook uncovered until butter turns golden and foam has risen to the top.
2. Add vegetable oil. Then add lamb, garlic, ginger and masala mix. Stir-fry for a few minutes.
3. Add onions and stir-fry for 5 minutes. Then add tomatoes and 2 glasses of water.
4. Cover and cook on low heat until the lamb is tender (at least 45 minutes).
5. Uncover, increase heat and stir until oil/ghee has separated from the masala. Keep frying for a few minutes. Add 1/2 cup water for desired thickness of the gravy.
Serves 4 (based on recommended portion size).
Calorie count: 795 per serving (assuming you pour all the sauce over your rice).
The verdict: The resulting lamb masala was super- yummy!!! We will definitely buy this mix again.
Some adjustments we will make in the future:
- The recipe didn't need quite so much water. The final 1/2 cup at the end wasn't really necessary. (The original recipe had actually asked for 1 to 1-1/2 cups water.)
- The sauce was fine as it was, but for health reasons, we could've reduced the butter and it would have still turned out all right. Next time I will try it with just 1/4 cup butter and 1/2 cup vegetable oil.
- We served some yogurt on the side to see if the dish would taste better with or without yogurt. Next time we will try it with maybe 1/2 cup of yogurt.
Ah, delicious. I love South Asian food!
Find other people blogging about: lamb+masala
Wednesday, February 14, 2007
Lettuce-growing
Believe it or not, I'm still ill! (It's been six weeks now, and I've been to the doctor thrice.) My taste buds are still affected so I still can't do any kitchen experiments and the only cooking I've done has been following recipes.
But in the meatime, the lettuce-growing project is underway. Last Saturday, I bought a small planter and had it filled with soil, but I hadn't read up on lettuce-growing yet. After doing some research I learned that the best way to grow lettuce is to plant seeds first (excuse my ignorance, the last time I did any gardening other than weeding was in 4th grade for, well, gardening class) and then transplant them. I also learned that the planter I chose might be a little too small and might only be able to hold two heads of lettuce at a time. So I used the planter I bought for the seeds and then this weekend I'll get a larger planter for the lettuce heads.

So far, so good. I kept the planter in our indoor garden to prevent the birds or cats from disturbing them. Today is Day 5 and some shoots are peeking out of the soil already. I looked at them with delight this morning and Mike himself had a moment of wonder when he said, "Cool! It's like you're participating in God's creative act."
Find other people blogging about: lettuce
But in the meatime, the lettuce-growing project is underway. Last Saturday, I bought a small planter and had it filled with soil, but I hadn't read up on lettuce-growing yet. After doing some research I learned that the best way to grow lettuce is to plant seeds first (excuse my ignorance, the last time I did any gardening other than weeding was in 4th grade for, well, gardening class) and then transplant them. I also learned that the planter I chose might be a little too small and might only be able to hold two heads of lettuce at a time. So I used the planter I bought for the seeds and then this weekend I'll get a larger planter for the lettuce heads.
So far, so good. I kept the planter in our indoor garden to prevent the birds or cats from disturbing them. Today is Day 5 and some shoots are peeking out of the soil already. I looked at them with delight this morning and Mike himself had a moment of wonder when he said, "Cool! It's like you're participating in God's creative act."
Find other people blogging about: lettuce
Sunday, January 28, 2007
Some oily lessons from Alton Brown
The smoking points of olive oil and butter are the lowest.
The smoking points of canola and corn oil are average.
The smoking point of safflower oil and peanut oil is among the highest.
Why is this important to know?
Because when oil reaches its smoking point, it begins to taste bad, so when you cook food that needs to be really hot, you don't want to use oil with low smoking point.
This means, then, that when searing steak, you want to use an oil with a lower smoking point. Not olive oil or butter, then.
I read elsewhere that vegetable oil also has a low smoking point.
Helpful advice, isn't it?
Find other people blogging about: cooking+tips
Sunday, January 21, 2007
New cookbook
After the success of today's Korean lunch, Mike very kindly bought me a Korean cookbook when we went to the supermarket today.

We also have two new Filipino cookbooks from Angie, who gave them to us for Christmas.
I'll let you know how the recipes turn out.
Find other people blogging about: cookbooks
We also have two new Filipino cookbooks from Angie, who gave them to us for Christmas.
I'll let you know how the recipes turn out.
Find other people blogging about: cookbooks
Korean Chicken Barbecue with Kim
It's Mike's birthday today, but he's ill (as am I) so we weren't in the mood to go out for lunch. So instead we stayed home and I finally tried my hand at Korean barbecue.
At Korean barbecue restaurants, we always have beef or pork (kalbi), but we haven't gone to the supermarket, and the only thing in our freezer was a packet of chicken thighs. We didn't have lettuce leaves either, but yesterday I had bought some kim (Korean nori) along with some Korean beanpaste at a Korean convenience store at Market Market, so for this recipe we used the kim instead.
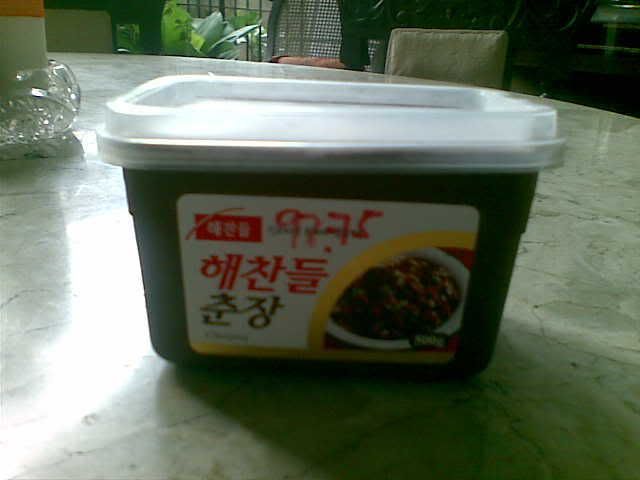
A tub of chunjang (Korean black bean paste)
With all these ingredients on hand, I went online to look for ideas as to how to make a Korean barbecue out of the ingredients I had on hand and this is what I came up with. This recipe serves 2.
Ingredients:
5 chicken thighs, deboned and deskinned
kim (Korean nori), cut into sheets measuring approximately 4" x 5"
3 cloves garlic
2 green chili peppers, sliced into slivers
sesame oil
steamed rice (one bowl per person)
Seasoning:
2 tbsp rice wine
1 tsp minced ginger
1 tbsp minced garlic
1 tbsp soy sauce
1 tbsp sugar
1 tsp pepper
1/2 onion, finely chopped
1/4 tsp chili powder
Dip:
sesame oil
salt
pepper
Korean black bean paste (chunjang/jajang)
Method:
Slice the chicken into strips. Marinate first in the rice wine and minced ginger for about 15 minutes. Then transfer to a separate bowl and mix well with the other marinade ingredients. Marinate for at least half an hour.
Put about a tsp of sesame oil on the electric grill. Grill the garlic and green peppers. When cooked, remove from grill and transfer to a plate. Grill the chicken on the same grill. When cooked, place the slices of grilled chicken on top of the garlic and green peppers.
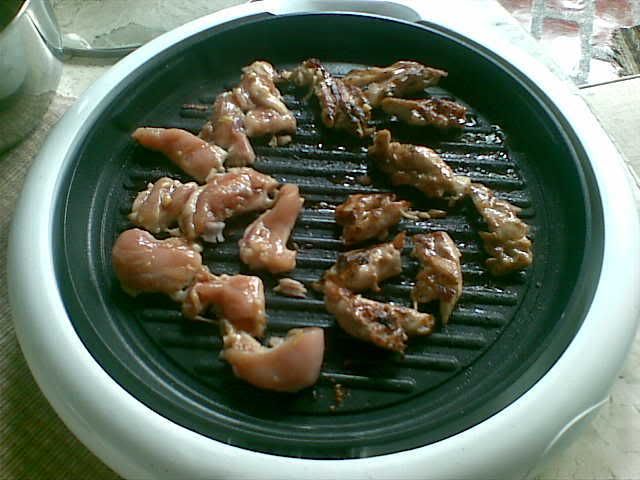
Prepare bowls of dip for each person. In one small bowl put about two tbsp of sesame oil, a pinch of salt, and around 1/4 tsp of ground pepper. In another small bowl, put 1 tsp of Korean black bean paste.
When the chicken is done, dip a slice of chicken into the sesame oil dip, put it on a sheet of kim together with a small amount of rice, and roll the kim. Dip the whole roll in the bean paste and eat!
Serves 2.
Verdict: It all came out quite yummy, although I'm sure the rolling process would've been less messy if we had used lettuce leaves instead of the tiny sheets of kim. But we were both very pleased with our meal, nonetheless.
Find other people blogging about: korean+barbecue
At Korean barbecue restaurants, we always have beef or pork (kalbi), but we haven't gone to the supermarket, and the only thing in our freezer was a packet of chicken thighs. We didn't have lettuce leaves either, but yesterday I had bought some kim (Korean nori) along with some Korean beanpaste at a Korean convenience store at Market Market, so for this recipe we used the kim instead.
A tub of chunjang (Korean black bean paste)
With all these ingredients on hand, I went online to look for ideas as to how to make a Korean barbecue out of the ingredients I had on hand and this is what I came up with. This recipe serves 2.
Ingredients:
5 chicken thighs, deboned and deskinned
kim (Korean nori), cut into sheets measuring approximately 4" x 5"
3 cloves garlic
2 green chili peppers, sliced into slivers
sesame oil
steamed rice (one bowl per person)
Seasoning:
2 tbsp rice wine
1 tsp minced ginger
1 tbsp minced garlic
1 tbsp soy sauce
1 tbsp sugar
1 tsp pepper
1/2 onion, finely chopped
1/4 tsp chili powder
Dip:
sesame oil
salt
pepper
Korean black bean paste (chunjang/jajang)
Method:
Slice the chicken into strips. Marinate first in the rice wine and minced ginger for about 15 minutes. Then transfer to a separate bowl and mix well with the other marinade ingredients. Marinate for at least half an hour.
Put about a tsp of sesame oil on the electric grill. Grill the garlic and green peppers. When cooked, remove from grill and transfer to a plate. Grill the chicken on the same grill. When cooked, place the slices of grilled chicken on top of the garlic and green peppers.
Prepare bowls of dip for each person. In one small bowl put about two tbsp of sesame oil, a pinch of salt, and around 1/4 tsp of ground pepper. In another small bowl, put 1 tsp of Korean black bean paste.
When the chicken is done, dip a slice of chicken into the sesame oil dip, put it on a sheet of kim together with a small amount of rice, and roll the kim. Dip the whole roll in the bean paste and eat!
Serves 2.
Verdict: It all came out quite yummy, although I'm sure the rolling process would've been less messy if we had used lettuce leaves instead of the tiny sheets of kim. But we were both very pleased with our meal, nonetheless.
Find other people blogging about: korean+barbecue
Saturday, January 20, 2007
Food for the ill.
I'm terribly sorry.
I've been ill since the beginning of the year (cough, sore throat, cold), so my tastebuds are shot, and I don't want to try anything in the kitchen for fear that my tastebuds might deceive me.
To keep this page updated, however, I decided to come up with a list of food for the ill....
I've been ill since the beginning of the year (cough, sore throat, cold), so my tastebuds are shot, and I don't want to try anything in the kitchen for fear that my tastebuds might deceive me.
To keep this page updated, however, I decided to come up with a list of food for the ill....
- fresh fruits
- chicken-flavored ramen
- salabat
- warm calamansi juice with honey (or a bit of sugar, if honey isn't available)
- green tea
- lugaw or am (for children) - for when your appetite is gone and you can't eat anything else
- a cure-all that I haven't tried but which my friend once recommended to me: green juice -- I've heard there are different recipes, but the most basic one blends together celery, cucumber, 1 clove garlic, and tomato.
Tuesday, January 09, 2007
Twenty-one tips for a thriftier kitchen!
Sorry, I'm still ill so my tastebuds are shot. As a result, I still can't recommend any recipes.
However, an email conversation with my friends and a post on a friend's blog have me thinking about ways to save money. Here are some kitchen-related tips for saving money:
(1) The simplest: cook instead of eating out! And I don't just mean lutong-bahay; instead of eating expensive meals in restaurants, Mike and I try to recreate our favorite restaurant meals right in our kitchen. Even if that means buying more expensive ingredients; it still comes out cheaper than eating in a restaurant. We encourage each other by reminding each other how much we save by eating in. ("This meal only cost us P150; if we had eaten this same meal in a restaurant, it would've cost us P300!")
(2) Bring lunch to work. We don't do this often, but every now and then Mike brings lunch to work.
(3) I don't do this myself, but at my in-laws' house, fish is fried in the backyard instead of in the kitchen. How does this save money? You don't need to switch on your hood or exhaust to get the smell of fish out.
(4) Drink water instead of sodas or instant drinks. I'm one to talk; I drink so much iced tea. Nonetheless, this is on my list of New Year's resolutions: water is cheaper, and it's healthier as well.
(5) Brew your own coffee. If you're one of those people who buy your daily coffee from Starbucks, then it's time to get a coffee-maker and make your own coffee at home. Knowing how much more one spends at a coffee shop over and above the material cost of a cup of coffee, Mike (the coffee-drinker of the two of us) has a good rule of thumb: he only goes to coffee shops to meet up with business associates or friends, and only if he intends to stay there for awhile. That way, he's paying for the use of the place, not for the coffee. (And the nationalist in him is biased towards local coffee shops like Figaro or Coffee Bean and Tea Leaf.)
(6) Buy a water filter/purifier instead of buying bottled water. Or, to save even more money, just boil your water (two minutes at full boil) and let it stand overnight. It's better for the environment too: no plastic bottles.
(7) Use a gas stove rather than an electric stove. In the Philippines, LPG is much, much cheaper.
(8) Learn to use extenders in food: bread crumbs in ground beef, for example.
(9) When buying meat, have the butcher pack the meat into portion-sized bags already. When Mike and I buy ground beef, for example, we ask the butcher to put it in bags of 250g portions. That way, we don't cook more than we need. (And it regulates our food intake as well!)
(10) Learn to make your own bread, yogurt, pancake mix, syrup, sandwich spread and jam. I don't do this but my father-in-law does.
(11) Grow your own vegetables. Again, something I haven't tried, though my in-laws used to do this as well.
(12) Save your lamb and chicken bones. Keep them in a sealed bag or container in the freezer. When you have enough, make your own lamb or chicken stock.
(13) If you buy deli cold cuts, consider buying the ends rather than the middle cuts, depending on what you intend to use the cuts for. They're cheaper.
(14) Save your cooking oil! It can be reused twice or thrice. Make sure, though, that you separate the oil that you use for fish, the oil that you use for meat, and the oil from longaniza or bacon fat (I learned this from our housekeeper when I was young). (I suppose this is the Philippine version of the Western tradition of never washing cast-iron cookware [they just wipe it down].)
(15) Buy energy-saving freezers and refrigerators. They're on all the time, so make sure they don't cost more than they have to.
(16) If you have excess freezer space, make ice. Excess freezer space wastes electricity (unlike excess refrigerator space which actually saves electricity). We often have excess freezer space (because we have a separate freezer), so we make ice in bags and sell them to our neighbors. (In the summer our housekeeper makes ice candy for sale as well!)
(17) Buy in bulk.
(18) Don't buy branded products when you can avoid it. We recently started buying homemade (non-branded) detergent, laundry bar, fabric softener and dishwashing liquid. It's less than half the price of stuff at the supermarket! At the grocery, goods which don't have famous brands are also usually a lot cheaper than the P&G/Unilever goods; with P&G/Unilever, you're just paying for all the marketing.
(19) If you just intend to toast your bread, freeze the loaf to make it last.
(20) Eat more veggies and less meat! Cheaper and healthier!
(21) Use rags instead of paper towels. And make rags from old cotton clothes rather than buying new ones. To disinfect rags and sponges pop them in the microwave after washing (30 seconds when dry, a minute when wet).
(22) Cut worn bath towels into smaller pieces, and hem. Ta-dah, a new hand towel for the kitchen!
(23) If you eat a lot of bread, collect your own breadcrumbs.
(24) Before you do your supermarketing, check your pantry and refrigerator and make sure that you've used up or have plans to use up ingredients from your last trip. The most wasteful thing is allowing food to expire before you've touch it!
(25) If you have a garden or a big-enough balcony with potted plants, make your own compost from kitchen waste.
(26) Reuse water. The rinsing water for your dishes or laundry or from washing rice can be used to water the plants.
(27) Segregate your rubbish. It won't necessarily save you money, but it will help save the earth. :)
Find other people blogging about: frugal+tips
Wednesday, January 03, 2007
What to do with New Year's fruits
Happy New Year!
I've been ill and haven't had time to putter around the kitchen, but if you want ideas as to how to finish eating all those round fruits you bought for your New Year's table spread, here are some suggestions from older posts:
I've been ill and haven't had time to putter around the kitchen, but if you want ideas as to how to finish eating all those round fruits you bought for your New Year's table spread, here are some suggestions from older posts:
Subscribe to:
Posts (Atom)


